Laying concrete slabs is a fundamental aspect of creating durable and stable surfaces for patios, walkways, and driveways. This step-by-step guide provides a comprehensive approach to properly laying concrete slabs, ensuring a professional finish and long-lasting results. From the initial preparation of the foundation to the final securing of the slabs, each step is crucial to achieve a well-constructed surface that can withstand the test of time and the elements.
Key Takeaways
- Proper site preparation, including excavation and compaction of the soil, followed by the installation of barrier fabric and drainage rock, is essential for a stable base.
- A meticulous approach to laying slabs, such as setting edge restraints, screeding the sand layer, and carefully installing paving slabs, ensures a uniform and level surface.
- Securing the placement of slabs with polymeric sand prevents shifting, provides stability, and maintains the integrity of the paved area over time.
Preparation and Foundation
Design Layout & Calculate Needs
Once the design layout is established and the needs are calculated, the next critical step is to determine the quantity of materials required for the project. This includes pavers, base material, and sand. Calculating the correct amount of materials is essential to ensure the project’s success and to avoid unnecessary costs or shortages during construction.
To accurately calculate the materials needed, measure the length and width of the area to obtain the total square footage. Then, add a 10% surplus to cover any wastage, which is a common occurrence in such projects. For more intricate designs involving curves or diagonal laying patterns, consider increasing the surplus to 15-20%. Here’s a simple guide to help with the calculations:
- Measure the area (Length x Width)
- Calculate the total square footage
- Add 10% for wastage (increase if necessary for complex patterns)
Purchasing materials in bulk can often lead to cost savings and convenience. It’s advisable to have these materials delivered directly to the site. For those unsure about the calculations, many websites offer services and online calculators to assist with concrete projects, including slabs and patios. Alternatively, consulting with a sales associate at a home improvement store or seeking advice from experts like Rhino Builders in Danville, CA, can provide trusted expertise and ensure that the foundation for your project is strong and reliable.
Excavate & Compact Native Soil
After designing the layout and calculating the necessary materials, the next critical step is to excavate the native soil. This involves removing all vegetation and organic matter until reaching a solid subgrade. It is essential to ensure that the excavation depth is consistent throughout the area to provide a stable base for the concrete slabs.
Once the soil is excavated, compaction is crucial to minimize future settling. A plate compactor or hand tamper can be used to compact the soil effectively. Special attention should be given to the edges and corners, which may be missed by larger equipment. The use of a level perimeter string can aid in maintaining an even gravel layer across the entire area.
The following tools and materials are recommended for this stage:
- Plate compactor or hand tamper
- Shovel
- Landscape rake
- Level perimeter string
- Gravel or crushed rock base material
It is worth noting that companies like Rhino Concrete Danville and Rhino Builders, with their extensive experience in concrete services and design/build processes, emphasize the importance of a well-compacted base to ensure the durability and longevity of concrete installations.
Install Barrier Fabric & Drainage Rock
Following the installation of the barrier fabric and drainage rock, the next critical step is to pour and compact the road base. This layer provides a stable foundation for the concrete slabs and ensures proper drainage, preventing water from pooling beneath the pavers. Thoroughly compact a 4-6 inch dense-graded aggregate base layer to create a firm and level surface. The process of screeding the surface completely flat is essential for the longevity and stability of the concrete installation.
The road base material typically consists of crushed stone or gravel and should be spread evenly across the prepared area. It is important to compact the base in layers, using a plate compactor or a heavy roller, to achieve the desired density and prevent future settling. The following table outlines the recommended thickness and compaction guidelines:
| Base Material | Recommended Thickness | Compaction Method |
| Crushed Stone | 4-6 inches | Plate Compactor |
| Gravel | 4-6 inches | Heavy Roller |
Once the road base is properly compacted, the edge restraints can be set. These restraints are crucial in keeping the entire perimeter structurally sound over the long term. They can be made of concrete, plastic, or steel and should be installed according to the design layout and calculated needs. This step ensures that the pavers will remain in place and maintain their intended design.
Pour & Compact Road Base
Following the installation of the barrier fabric and drainage rock, the next critical step is the pouring and compaction of the road base. A dense-graded aggregate base layer of 4-6 inches is recommended for optimal support and stability. This layer should be screeded to ensure a completely flat surface, which will serve as the foundation for the paving slabs.
The process of laying the base material involves transferring it to the designated area, spreading it evenly, and then compacting it firmly. It is essential to maintain an even distribution across the entire area to prevent future settling or shifting of the slabs. Here are some tips for effective compaction:
- Use a tamper or plate compactor for uniform compaction.
- Renting compaction equipment from a local store is a viable option if you do not own one.
- For hard-to-reach edges and corners, a hand tamper can be particularly useful.
- Periodically spraying the area with water can aid in better compaction and dust reduction.
Once the road base is properly compacted, it is crucial to verify the level of the area. This can be done by measuring off a level perimeter string to ensure the gravel is even across the whole patio or slab area. The next phase involves setting edge restraints to keep the perimeter structurally sound over the long term.
Laying and Securing the Slabs
Set Edge Restraints
Once the edge restraints are set, they play a crucial role in maintaining the integrity and shape of the paving area. Proper installation of edge restraints is essential to prevent the pavers from shifting over time. The edge restraint should be secured directly to the base material, ensuring that any bedding is scraped away before installation. This step is often overlooked, but it is vital for the longevity of the pavement.
For areas that will bear vehicular traffic, the choice of paver pattern is also significant. Patterns like herringbone, which provide a high degree of interlock, are recommended to counteract the shifting caused by the movement of vehicles. In contrast, linear patterns such as running bonds may lead to instability and should be avoided.
Here is a concise list of steps to ensure the edge restraints are properly installed:
- Scrape away all paver bedding from the area where the edge restraint will be placed.
- Position the edge restraint directly on the compacted base material.
- Secure the edge restraint with stakes if necessary, driving them into the ground at required intervals.
It is important to consult with professionals like Rhino Concrete Danville for expert advice on installing concrete retaining walls or similar structures. Their experience in crafting functional and aesthetic solutions can be invaluable for complex projects.
Screed 1″ Sharp Sand Layer
After setting the edge restraints, the next critical step is to lay down the screed 1″ sharp sand layer. This layer serves as the bedding for the paving slabs and must be executed with precision to ensure a level and stable base. Begin by spreading a slightly moist, coarse concrete sand across the area. The moisture helps the sand particles to bind together, creating a firmer base.
To maintain an even height across the entire surface, professionals often use two parallel pipes as guides. The sand is poured over these pipes, and a screed board is then pulled across them to level the sand to the desired height. The pipes ensure that the screed does not dig too deep, maintaining a consistent 1-inch layer.
Once the sand is screeded, it is essential to perfect the base contours before installing the paving slabs. This meticulous preparation is what distinguishes a professional job, such as those done by Rhino Concrete Danville in Danville, CA, known for their reliable and durable concrete work. The final height of the patio or driveway is determined at this stage, so attention to detail is paramount.
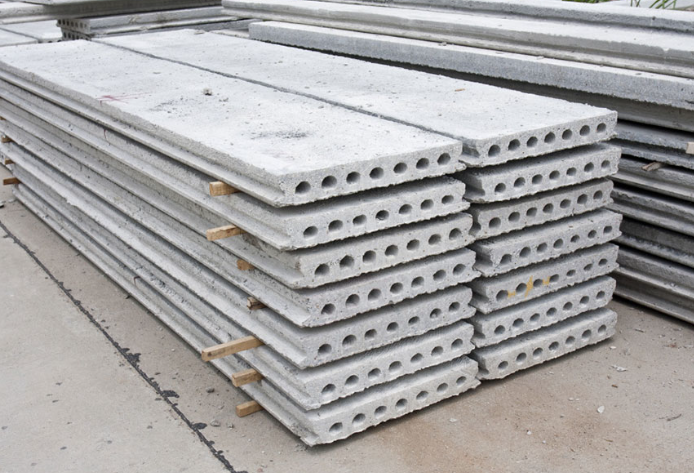
Install Paving Slabs
Once the installation of paving slabs is underway, it is crucial to pay attention to the bedding process. This step ensures that the slabs are set on a stable and even layer, which will support them over time. The bedding material, typically a mixture of sand and cement, should be spread evenly before placing the slabs.
After spreading the bedding material, the slabs can be laid down. It is important to lay the slabs in the desired pattern, leaving equal spaces between them for jointing material. Here is a simple list to follow for laying the slabs:
- Spread the bedding material to a uniform thickness.
- Lay the slabs on the bedding material, following the predetermined pattern.
- Use a rubber mallet to gently tap the slabs into place, ensuring they are level.
- Leave the appropriate gaps between slabs for the jointing material.
Once the slabs are in place, the next step is to secure them with jointing material. This will prevent movement and maintain the integrity of the pavement. For those wondering how to lay concrete slabs, it is essential to follow these steps meticulously to achieve a professional and durable finish.
Bedding and Placement of Pavers
After the pavers are laid out and properly spaced, the next critical step is to secure their placement. This is achieved by using polymeric sand, which is essential for locking the pavers together and preventing weed growth and insect intrusion. The process involves carefully sweeping the sand into the joints between the pavers and then compacting it to ensure a tight fit.
Once the polymeric sand is in place, it’s important to remove any excess from the surface of the pavers. This is typically done with a soft broom, ensuring that the sand is only within the joints and not on the pavers themselves. After sweeping, the area should be gently wetted down to activate the binding agents within the polymeric sand. This creates a strong, durable bond that will maintain the integrity of the pavement over time.
For those seeking high-quality paving solutions, Rhino Concrete Danville provides durable and aesthetically pleasing options. Their interlocking and architectural slab pavers are known for enhancing property value and safety, making them a suitable choice for both residential and commercial spaces.
Ensure Placement with Polymeric Sand
After the paving slabs are installed, the final step is to ensure their placement with polymeric sand. This specialized sand serves as a locking agent between pavers, which not only stabilizes the installation but also helps prevent weed growth and insect infestation.
Sweep the polymeric sand into the joints between the pavers, ensuring that they are filled. This process may need to be repeated to account for settling after the initial application. Once the joints are filled, remove any excess sand from the surface of the pavers.
The next phase involves gently wetting the sand. This activates the polymers, causing the sand to harden and lock the pavers in place. It is crucial to follow the manufacturer’s instructions for watering, as over-saturation can wash away the sand, while insufficient water may not properly activate the binding agents.
Below is a checklist to ensure proper application of polymeric sand:
- Sweep sand into all paver joints
- Remove excess sand from the paver surface
- Gently water the pavers as per the manufacturer’s guidelines
- Allow the installation to dry and set completely
Once the polymeric sand has been set, the concrete slabs are secured, and the installation is complete. It is advisable to check the integrity of the installation after a few days to address any areas that may require additional sand due to settling.
Embarking on a new project can be daunting, but with Rhino Concrete Danville, laying and securing your concrete slabs is a breeze. Our team of experts in Danville, CA, is equipped to handle every aspect of your concrete needs, ensuring a solid foundation for your home or business. Don’t wait to enhance the value and beauty of your property. Visit our website today to explore our services and get a quote for your next project. Let’s build something extraordinary together!
Conclusion
Laying concrete slabs is a meticulous process that requires careful planning and execution. From the initial design layout to the final placement of pavers, each step plays a crucial role in ensuring a durable and aesthetically pleasing result. By following the step-by-step guide outlined in this article, you can achieve a professional-grade patio or path installation that stands the test of time. Remember to consider the slope for water runoff, use the correct materials for your region, and maintain the necessary spacing between slabs. With these tips and a bit of patience, your concrete slab project will not only enhance the beauty of your outdoor space but also provide a solid foundation for years to come.
Frequently Asked Questions
What is the purpose of using polymeric sand when laying concrete slabs?
Polymeric sand is used to fill the joints between pavers, including concrete slabs, which helps to secure the placement and prevent weed growth and moisture damage. It hardens after wetting, creating a strong bond that maintains the integrity and alignment of the pavers.
How do I ensure my concrete slab has the correct slope for drainage?
When designing the layout, ensure the area has a slight slope to allow water runoff, preventing pooling and potential damage. Use a garden hose to get a sense of space and refine the slope with stakes and twine, checking with a carpenter’s square and ensuring a 2-degree slope during the bedding process.
What is screeding and why is it important in laying concrete slabs?
Screeding is the process of leveling the sand or aggregate base layer before laying pavers using a long, straight board that moves back and forth over the surface. It ensures a flat and even foundation, which is crucial for the stability and appearance of the finished patio or path.