Pouring a concrete slab is a crucial step in many construction projects. Whether you’re building a foundation for a house, constructing a patio, or adding a new driveway, knowing how to properly pour a concrete slab is essential. This ultimate guide will provide you with the instructions to ensure that your concrete slab is strong, durable, and built to last.
Tools and Materials Needed for Pouring a Concrete Slab
Before you begin pouring your concrete slab, it’s important to gather all the necessary tools and materials. Here’s a list of what you’ll need:
- Concrete mixer or wheelbarrow
- Concrete forms
- Rebar or wire mesh
- Shovel or excavator
- Level
- Float or trowel
- Concrete mix
- Water
- Safety gear (gloves, goggles, and boots)
Having these tools and materials on hand will make the process smoother and ensure that you have everything you need to complete the project successfully.
When to Pour a Concrete Slab

Pouring a concrete slab involves considering various factors, including the weather, the type of project, and the preparation of the site. Here are key considerations for timing your concrete pour:
- Weather Conditions:
- Temperature: The best temperatures for pouring concrete are between 50°F and 60°F (10°C to 15°C). Concrete sets too quickly in hot weather and too slowly in cold weather.
- Avoid Freezing: Do not pour concrete if temperatures are expected to fall below freezing within 24 hours.
- Rain: Light rain might not be a problem, but heavy rain can ruin freshly poured concrete. It’s essential to check the weather forecast and have a plan for covering the concrete in case of rain.
- Time of Day:
- Pouring in the early morning can be ideal, especially in hot weather, to take advantage of cooler temperatures.
- Avoid pouring in the late afternoon if temperatures will drop significantly overnight.
- Seasonal Considerations:
- Spring and Fall: These are often the best seasons for concrete work due to moderate temperatures.
- Summer: Requires careful planning to avoid extreme heat, which can cause the concrete to set too quickly.
- Winter: Can be challenging unless you can ensure the ground isn’t frozen and temperatures remain above freezing.
- Project Readiness:
- Ensure that all preparations, like framing the area and installing reinforcement, are completed before the concrete arrives.
- Work with your concrete source to make sure the delivery happens on time.
- Curing Time:
- Plan for enough curing time after the pour. Concrete typically needs at least 24 to 48 hours to set enough for light foot traffic.
- It can take a few weeks for the concrete to fully cure and reach its full strength.
- Labor Availability:
- Schedule the pour when you have enough labor available to handle the concrete quickly and efficiently.
Preparing the Site for Pouring a Concrete Slab
Before you start pouring the concrete, you need to prepare the site properly. Here are the steps to follow:
- Clean up the area: Get rid of any plants, rocks, or other trash that are on the spot. This will ensure a clean and level surface for your concrete slab.
- Excavate the soil: Use a shovel or excavator to dig out the area where the slab will be poured. The depth of the excavation will depend on the thickness of the slab you’re planning to pour.
- Compact the soil: Use a compactor or tamper to pack down the soil after you’re done digging.This will provide a stable base for your concrete slab and help prevent settling or cracking in the future.
Setting up Concrete Slab Formwork
Formwork is necessary to shape and contain the concrete until it cures. Here’s how to set up the formwork for your concrete slab:
- Measure and mark the dimensions: Use a tape measure and stakes to mark the length and width of your slab. Make sure the corners are square and the lines are straight.
- Install the forms: Place the forms along the marked lines, ensuring they are level and secure. Use stakes and screws to hold the forms in place.
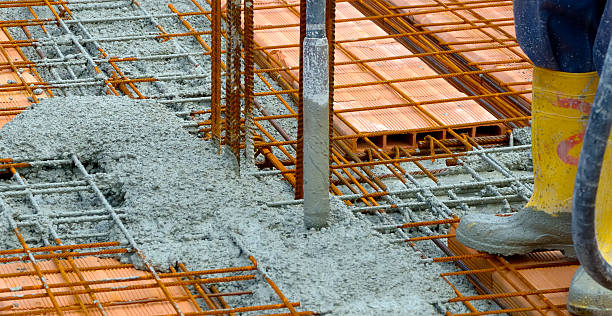
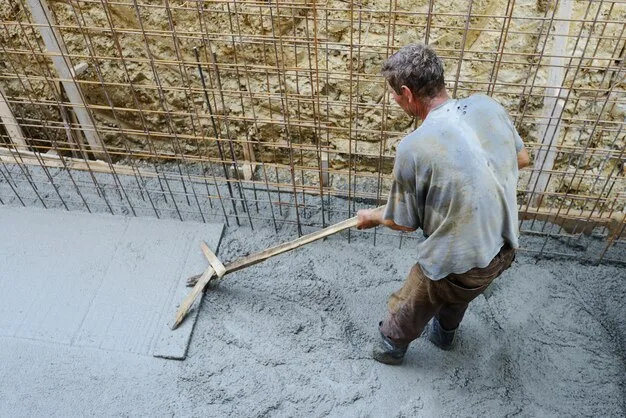
- Reinforce the forms: Add rebar or wire mesh inside the forms to reinforce the concrete. This will provide additional strength and prevent cracking.
Mixing and Pouring the Concrete for the Slab
Mixing and pouring the concrete is a critical step in the process. To pour successfully, follow these steps:
- Prepare the concrete mix: Follow the instructions on the bag of concrete mix to create the right consistency. Use a concrete mixer or wheelbarrow to mix the concrete thoroughly.
- Pour the concrete: Start pouring the concrete into the forms, starting from one corner and working your way across. Fill the forms evenly, ensuring that the concrete reaches the top.
- Consolidate the concrete: Use a shovel or a vibrating tool to consolidate the concrete and remove any air bubbles. This will help ensure a solid and uniform slab.
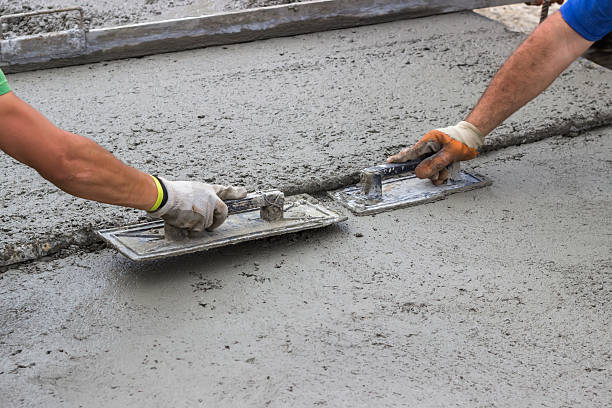
Leveling and Smoothing the Concrete Slab
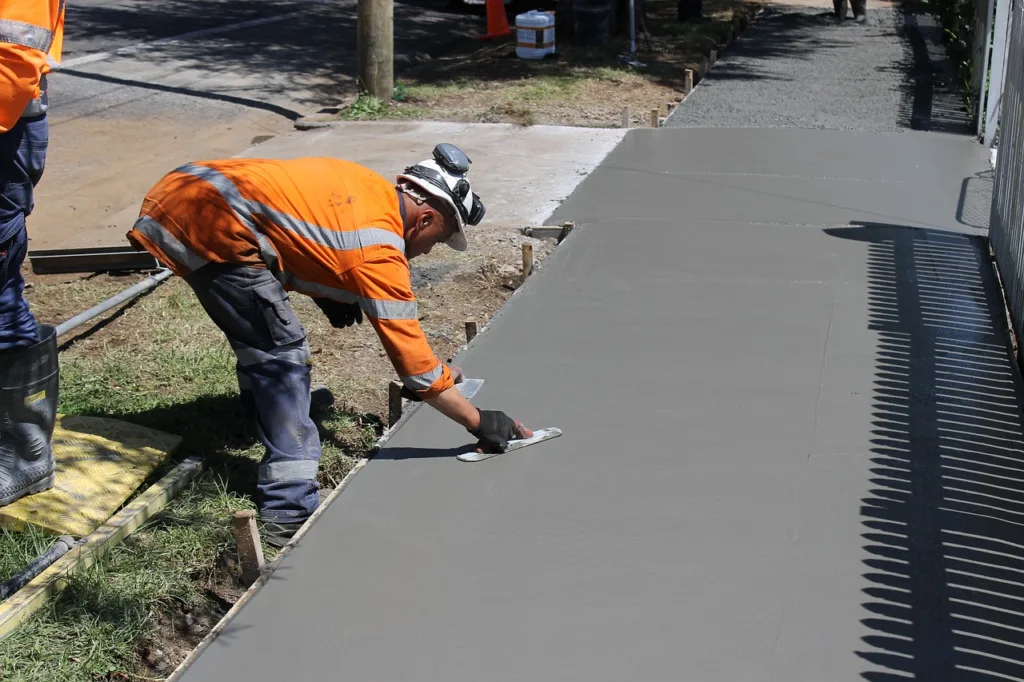
Once the concrete is poured, it’s important to level and smooth the surface for a professional finish.
Leveling and smoothing a concrete slab is essential for achieving a durable, high-quality finish. Here’s a condensed guide:
- Prepare the Area: Clean the slab by removing debris and dust. Repair any cracks with a patching compound and let it dry.
- Check for Levelness: Use a level to identify uneven spots. Mark areas needing adjustment.
- Apply Leveling Compound: If the slab is significantly uneven, mix and pour a self-leveling compound, guiding it to fill low spots.
- Smooth the Surface: Use a bull float or hand float for initial smoothing. Once the concrete sets further, smooth it with a steel trowel or power trowel for larger areas.
- Curing: Keep the surface moist for days after smoothing to prevent cracking, using wet burlap, plastic sheeting, or a curing compound.
Tips:
- Work in mild weather to ensure proper curing.
- Have all necessary tools and materials ready before starting.
- Practice and patience are crucial for first-timers.
- For large or critical projects, consider professional help.
This streamlined approach focuses on key steps and tips for a successful concrete leveling and smoothing project.
Curing and Finishing the Concrete Slab
Curing is a vital step in the concrete pouring process as it allows the concrete to harden properly. Here’s how to cure and finish your concrete slab:
- Cover the slab: After finishing, cover the slab with plastic sheeting or a curing compound. This will prevent moisture loss and promote proper curing.
- Maintain moisture: Keep the concrete moist by lightly spraying it with water or using a sprinkler. This will help the slab cure slowly and gain strength over time.
- Remove the forms: Once the concrete has cured for at least 24 hours, remove the forms carefully. Use a hammer or pry bar to loosen them and avoid damaging the concrete.
Tips for a Successful Concrete Slab Pour
Pouring a concrete slab can be a complex process, but with the right preparation and understanding, it can be a successful project. Here are some tips for a successful concrete slab pour:
- Plan Ahead: Before you start, plan your pour. This includes calculating and ordering the right amount of concrete and gathering all the necessary tools.
- Prepare the Site: The area where the slab will be poured needs to be prepared. This includes leveling the ground, creating forms, and installing rebar.
- Check Weather Conditions: It’s best to pour concrete in dry, warm conditions. For most ready-mixes, the temperature should be 70 degrees Fahrenheit or higher for five days after pouring.
- Use Ready-Mix Concrete: For most do-it-yourselfers, the best material for building a concrete slab is a ready-mix, crack-resistant concrete product.
- Ensure Safety: Safety should always be top of mind. This includes ensuring a safe and legal entryway onto your site, a direct route and safe access to pump units, and a clear, spacious, and level area of ground with a firm base capable of supporting trucks and their crews.
- Curing: After the concrete has been poured, it needs to be kept moist for at least 7 days to ensure adequate strength.
Remember, careful planning and execution are key to a successful concrete slab pour.
Conclusion
Pouring a concrete slab may require some effort and attention to detail, but with the right tools, materials, and instructions, it can be a manageable task. By following this ultimate guide, you’ll be equipped with the knowledge and confidence to successfully pour a concrete slab for any construction project you undertake. Remember to plan carefully, work diligently, and seek professional advice when needed. With these steps and tips in mind, you’ll achieve a strong and durable concrete slab that will stand the test of time.
If you’re looking for professional assistance with your concrete slab project, don’t hesitate to contact Rhino Concrete Danville. Our team of experienced professionals can provide expert guidance and high-quality workmanship to ensure your concrete slab is poured to perfection. Whether it’s a small patio or a large foundation, Rhino Concrete Danville has the expertise to get the job done. Reach out to us today for all your concrete slab needs.