You’re building a new concrete structure and notice irregular voids and gaps on the surface – this honeycombing effect indicates potential weaknesses in the concrete. By understanding what causes these voids, how to prevent them, and repair methods, you can ensure your concrete pours are high quality. This article will provide an in-depth look at identifying concrete honeycombing, addressing the root causes, implementing preventative measures during pouring and finishing, and repairing any honeycombing that occurs. Arm yourself with the knowledge needed to avoid compromising your concrete work.
What Is Concrete Honeycombing?
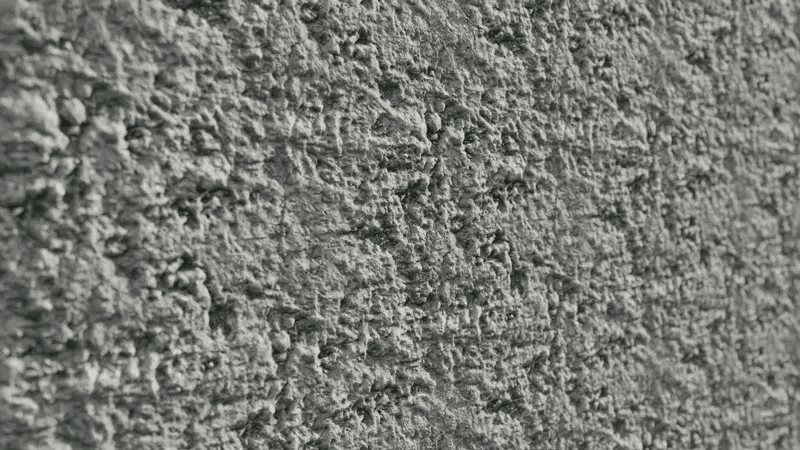
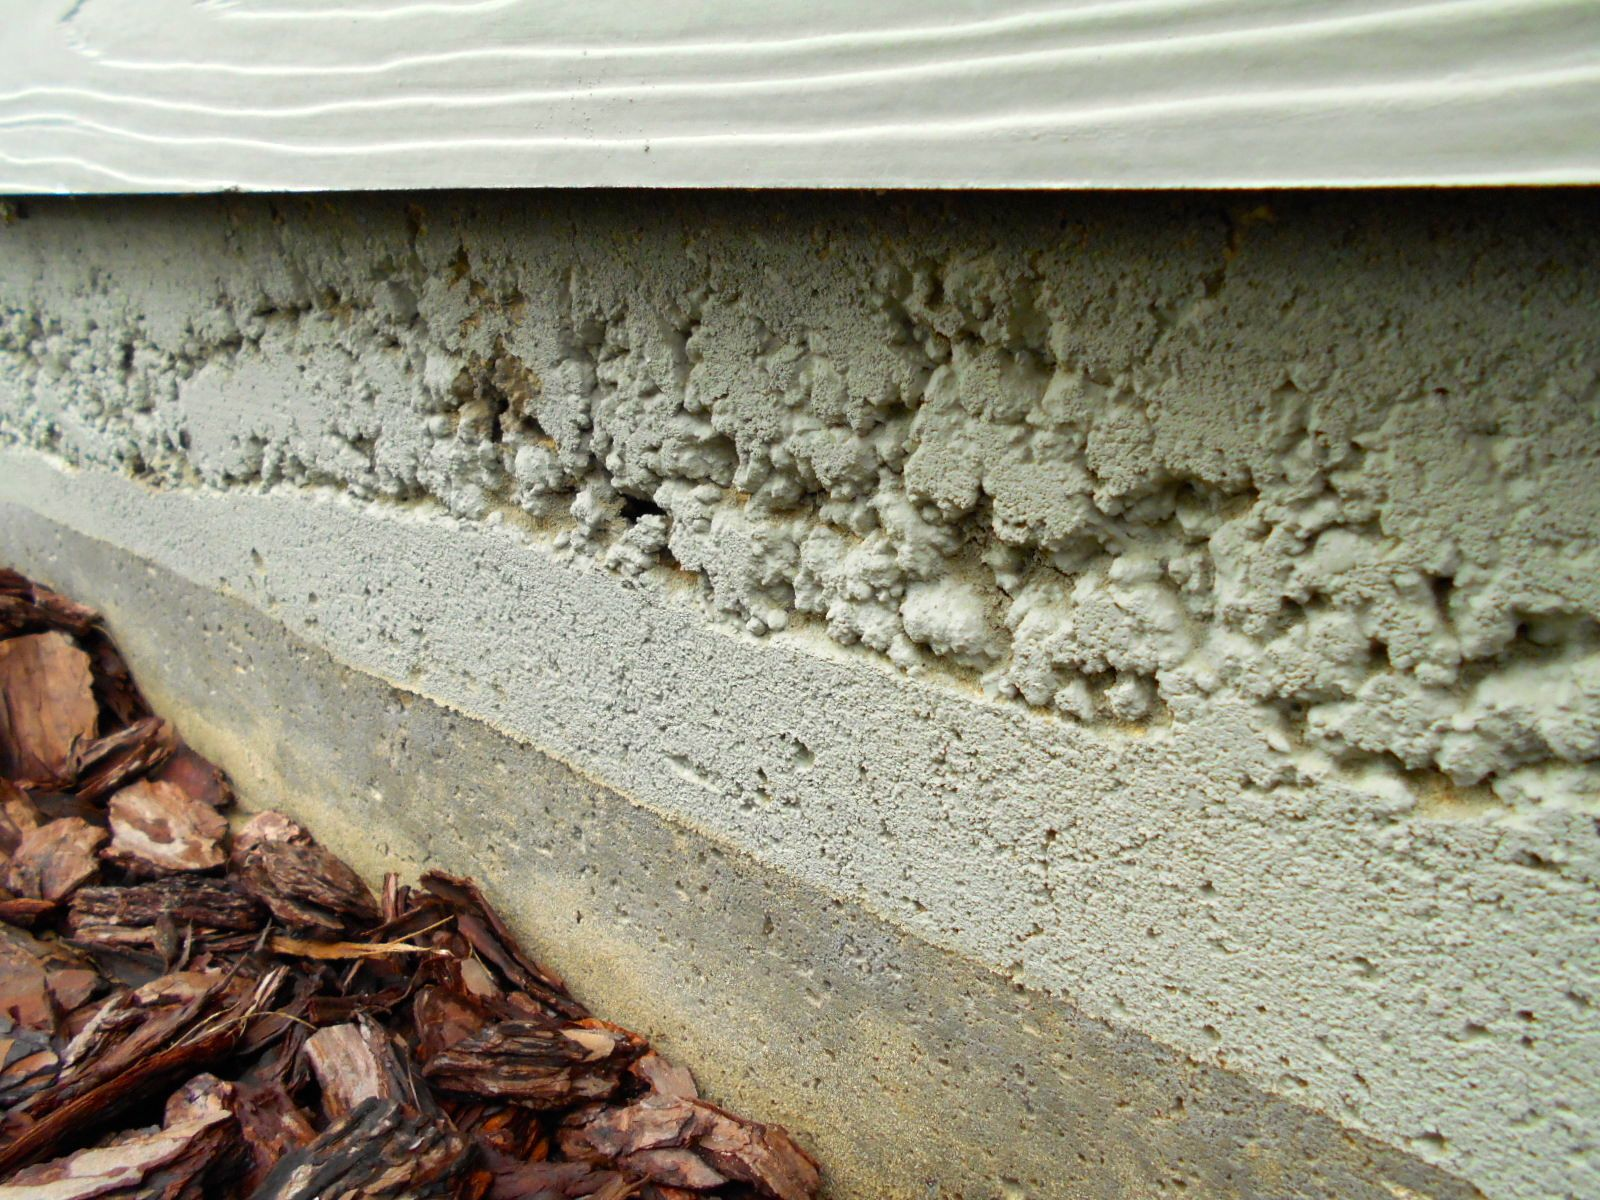
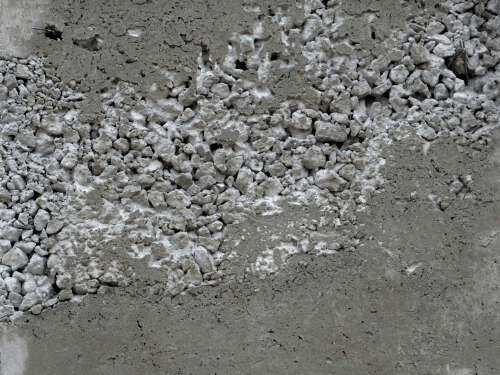
Honeycombing in concrete refers to the porous, uneven areas where the cement paste has not filled in properly around the coarse aggregate particles. It leaves small air pockets and holes in the concrete mass, reducing its strength and durability.
Causes of Honeycombing
There are a few reasons why honeycombing occurs:
- Inadequate vibration during pouring and compacting. The concrete is not consolidated fully, leaving air voids. Using high-power vibrators and waiting for the proper consistency of the concrete before pouring can help prevent this.
- An improper mixture of concrete ingredients. Too much water or not enough cement in the batch can lead to a soupy mixture that does not flow and fill in properly. Carefully following the recommended specifications for your concrete application is key.
- Obstructions in the formwork. Protruding bolts, ties, or other obstructions can create voids behind and around them. Ensure formwork is clear and sealed before pouring.
- An uneven subgrade. An irregular, sloping, or rocky subbase will not provide even support for the concrete, making it difficult to consolidate and finish level. Prepare subgrades thoroughly before pouring concrete.
Preventing and Repairing Honeycombing
The best way to deal with honeycombing is to prevent it in the first place through proper pouring and finishing techniques. However, minor honeycombing can often be repaired using a cementitious patch compound, epoxy injection, or re-pouring another layer of concrete over the top. For severe damage, especially in structural applications, removal and replacement of the concrete may be necessary. Following best practices for mixing, pouring, and curing concrete will help avoid the additional costs and effort involved in repairing honeycombed areas.
Common Causes of Concrete Honeycombing
Trapped Air Bubbles
During the pouring and curing process of concrete, air bubbles can become trapped beneath the surface. As the concrete hardens, these air pockets remain empty voids in the structure, creating a honeycomb effect. To prevent this, concrete should be poured slowly and carefully to vibrate as it’s placed to release any trapped air.
Insufficient Compaction
When concrete is not adequately compacted during pouring and curing, air pockets and weak spots develop in the structure. Proper compaction requires slowly pouring the concrete in lifts, or layers, and vibrating each lift to densify the material before the next lift is added. Power tools like internal vibrators and screeds can be useful for compacting concrete, especially in complicated forms.
Excessive Water
Too much water in the concrete mixture can create a soupy, unstable batch that is difficult to pour and compact. As the excess water evaporates during curing, air voids are left behind. The water-cement ratio should be carefully controlled to produce a workable yet stable concrete mixture. Generally, a lower ratio leads to a stronger, more durable end product.
Curing Issues
Proper curing is essential for minimizing honeycombing and achieving maximum strength in concrete. Curing involves keeping the concrete moist as it hardens so full hydration of the cement can occur if the surface of the concrete dries out too quickly, hydration stops and honeycombing forms. Membrane curing compounds, wet burlap coverings, and plastic sheeting are useful for retaining moisture during the curing process.
Understanding these common causes of honeycombing in concrete can help prevent and minimize this condition. Producing high-quality, durable concrete requires careful control of the entire pouring and curing process to achieve a strong, structurally sound end result.
How to Prevent Concrete Honeycombing
To prevent concrete honeycombing, proper concrete placement and consolidation are essential. As the contractor entrusted with pouring the concrete, you must take the necessary precautions to guarantee a smooth, defect-free surface.
Choose a Suitable Concrete Mix
Select a concrete mix design with an appropriate slump for the job. For narrow or congested spaces, use a mix with a slump of 4 to 6 inches to ensure proper flowability and consolidation. For walls and columns, a slightly wetter mix with a slump of 5 to 7 inches is typically suitable. The concrete should be pliable enough to flow around reinforcement and fill the formwork completely but not so wet that segregation occurs.
Properly Consolidate the Concrete
As you place the concrete in the forms, consolidate it thoroughly with an internal vibrator. Insert the vibrator throughout the pour at close enough intervals to ensure compaction, typically every 2 to 3 feet. Slowly lower the vibrator into the concrete, allowing trapped air to escape. Move it up and down, withdrawing it slowly to avoid creating air pockets.
Place Concrete Evenly and Continuously
Pour the concrete steadily and uniformly to prevent the trapping of air bubbles against the formwork. Do not allow the pour to free fall more than 3 to 5 feet, as this can also contribute to air entrapment and honeycombing. A concrete placer or crane and bucket are used to deposit the concrete into the forms carefully. Once pouring has started, continue uninterrupted until you have completed the scheduled pour.
Remove Air Pockets From Forms
Before the concrete has set, use a rubber mallet to tap along the forms, especially in corners and angles. This helps loosen any trapped air pockets so they can rise to the surface. You can also insert a vibrator along the edges and into corners of the formwork to release air pockets. Make multiple passes to ensure proper consolidation.
By following these best practices for placing and consolidating concrete, you can minimize defects like honeycombing and produce high-quality, durable concrete structures. Take the necessary time to do the job right, and you’ll achieve superior results.
Identifying Concrete Honeycombing in Your Project
Concrete honeycombing refers to air pockets that form in concrete during the pouring and setting process. These air pockets are detrimental to the strength and durability of concrete structures. As a project owner, it is important to identify honeycombing in the early stages to determine appropriate repairs.
Visual Inspection
A visual inspection of freshly poured concrete is the first step in identifying honeycombing. Look for small air pockets, typically ranging from 1 to 3 inches in diameter, on the surface of walls, columns, beams, or slabs. The honeycomb pockets will appear as rough, uneven areas on an otherwise smooth concrete surface. In severe cases, you may notice entire sections of concrete with a porous, sponge-like texture.
Tapping or Scratching the Surface
Tap the concrete surface with a hammer or screwdriver to determine if honeycombing exists below the surface. An echoing, hollow sound indicates the presence of air pockets below, while a solid, dense sound suggests properly consolidated concrete. You can also scratch the surface with a key or knife to check if the concrete flakes or crumbles away easily, signaling honeycombing.
Inspecting Formed Surfaces
Check inside formed concrete surfaces like columns or walls for honeycombing once forms have been removed. Honeycombing often occurs in formed concrete because the congested space restricts concrete flow and air release. Look for rough, uneven-formed surfaces as an indicator that honeycombing may exist below the surface.
To summarize, honeycombing in concrete can be identified through visual inspection, tapping or scratching the concrete surface, and inspecting inside formed concrete surfaces. Early detection of honeycombing is key to minimizing structural issues and ensuring appropriate repairs to strengthen your concrete structure. Consulting with a structural engineer on proper testing and repair methods is strongly recommended.
Repairing Concrete Honeycombing Damage
Concrete honeycombing damage requires repair to restore structural integrity and prevent further deterioration. The specific repair method depends on the severity and location of the damage. For minor surface damage, applying a concrete patch compound may suffice. More extensive damage requires chiseling out loose concrete and patching the area. In severe cases, reinforcing the structure may be necessary.
Applying Concrete Patch Compound
A concrete patch compound can be applied to small surface holes and voids. Clean out loose debris, then fill the area with the compound according to the product directions. Smooth it to match the surrounding surface. Concrete patch compound provides an easy, inexpensive fix but will not strengthen the structure. It is best for cosmetic repairs only.
Chiseling Out and Patching Damaged Areas
For deeper holes or extensive surface damage, the weakened concrete must be removed. Carefully chisel out loose and damaged concrete until you reach solid, intact material. Clean and dampen the area, then apply a concrete bonding agent. Mix concrete patch compound or concrete and trowel it into the space, overfilling slightly. Once dry, sand or grind the patch even with the surface. These patches will restore strength and protect rebar and structural steel.
Adding Reinforcement
If damage exposes or affects concrete support structures, reinforcement is required. You may need to consult an engineer to determine the best reinforcement method. Options include epoxy-injecting cracks, adding structural steel plates, or applying fiber-reinforced polymer composites. For severe damage, partial replacement of concrete sections may be necessary to restore strength and stability fully.
With proper diagnosis and repair, concrete honeycombing damage can be addressed to ensure safety and longevity of the structure. However, the underlying cause of the damage should also be determined and prevented to avoid future issues. Regular concrete maintenance and re-evaluation of structure can help identify potential problems early.
Conclusion
Now that you have a solid understanding of the causes of concrete honeycombing and how to prevent it through proper concrete placement and vibration techniques, you are well-equipped to tackle concrete projects with confidence. While minor honeycombing may be merely cosmetic, severe cases can have significant structural implications and must be addressed promptly. Regularly inspect new concrete for defects and make repairs as soon as possible to ensure the integrity of your structures. By being vigilant during the pouring process and promptly addressing any honeycombing that does occur, you can create durable, long-lasting concrete structures free of this common defect. With this knowledge, you are now prepared to pour strong, beautiful concrete projects that will stand the test of time.
At Rhino Concrete Danville, we understand the importance of proper concrete placement and vibration techniques to prevent honeycombing. If you need help with your concrete project, visit our blog page for tips and guides. For more information or to request assistance with your project, please visit our website and contact us.
Frequently Asked Questions
Is honeycomb good for concrete?
No, honeycomb is not good for concrete. Honeycomb formation in concrete structures is a significant concern in the construction industry, leading to compromised integrity and durability. It weakens the concrete, making it susceptible to water penetration, corrosion, and structural failure. Honeycomb formation can occur due to various factors such as inadequate vibration during pouring, improper concrete mix design, poor workmanship, and improper placement techniques.
How to fix honeycomb in concrete?
To fix honeycomb in concrete, the first step is to remove all loose aggregate and concrete from the affected area. Next, clean the concrete surface thoroughly. For larger honeycomb areas, create a pocket with a chipping hammer and pour a mixture of white cement and concrete grout into it. Apply pressure with a piece of wood or formwork material to ensure the mixture fills the void. After 12-16 hours, remove the formwork material and allow the area to cure properly. This process helps to fill the voids and restore the structural integrity of the concrete.
What causes honeycombing?
Honeycombing in concrete is caused by various factors, including:
- Inadequate vibration during pouring: Insufficient vibration can lead to air pockets and voids in the concrete.
- Improper concrete mix design: Incorrect proportions of cement, aggregates, water, and other additives can result in honeycomb formation.
- Poor workmanship: Inadequate placement techniques and lack of proper compaction can cause honeycomb.
- Improper placement techniques: Pouring concrete from excessive heights, using formwork that lacks rigidity and water tightness, and congestion of steel bars can all contribute to honeycomb formation.
How do you prevent honeycombs in concrete?
To prevent honeycombs in concrete, follow these steps:
- Proper concrete mix design: Ensure the mix design is correct for the intended use and achieve a uniform mixture.
- Proper placement and compaction: Use adequate vibration to fully compact the concrete and prevent voids.
- Formwork design and construction: Ensure the formwork is tight and waterproof to prevent grouts from leaking out.
- Proper concrete pouring: Pour concrete from a suitable height and avoid excessive heights.
- Use of rigid formwork: Apply tape outside the formwork with a wooden hammer during pouring to reduce the risk of honeycombing.
- Clean placement of steel bars: Secure steel bars at their correct positions and maintain designated bar spacing to facilitate concrete flow and compaction.
What causes honeycomb in concrete?
Honeycomb in concrete is caused by various factors, including:
- Low concrete workability: Improper w/c ratio can lead to honeycomb formation.
- Over-vibration of concrete: Excessive vibration can cause air pockets and voids.
- Inadequate concrete compaction: Poor compaction can result in honeycomb.
- Addition of extra water: Adding extra water to increase workability can increase the likelihood of honeycomb.
- Pouring concrete from excessive heights: Pouring concrete from heights greater than 1.5 meters can lead to honeycomb.
- Formwork lacks proper rigidity and water tightness: Grouts leaking out of poured concrete can cause honeycomb.
- High aggregate content and oversized aggregates: Using high aggregate content or oversized aggregates can lead to honeycomb.
- Congestion of steel bars: Overcrowding steel bars can cause honeycomb.
- Small concrete cover over steel bars: Insufficient concrete cover can lead to honeycomb.
- Placement of concrete that has lost workability: Pouring concrete that has lost its workability can cause honeycomb